https://dan.drown.org/stm32duino/package_STM32duino_index.json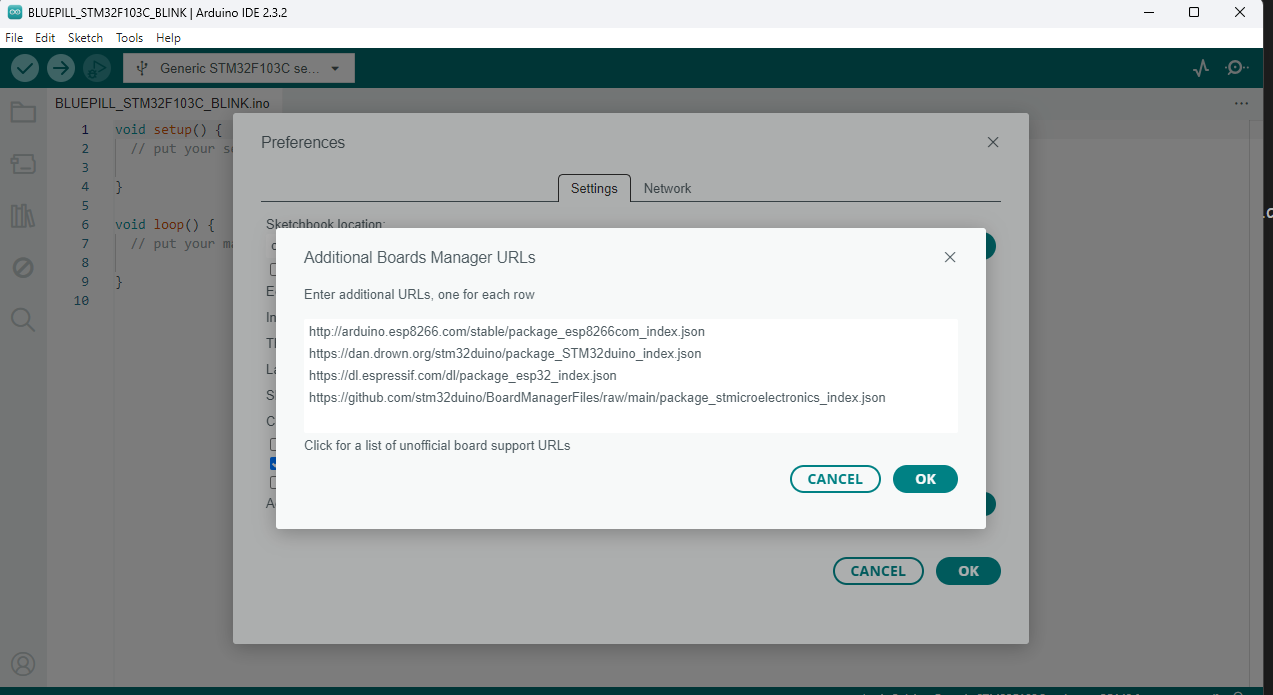
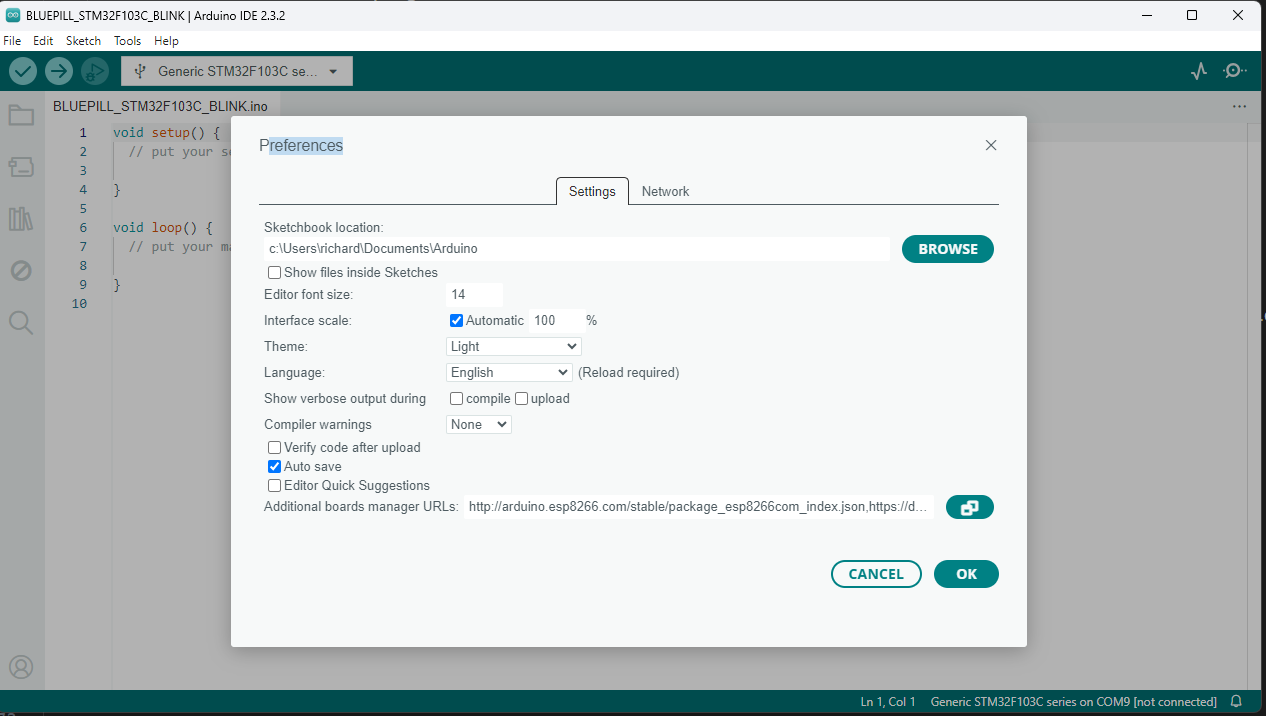
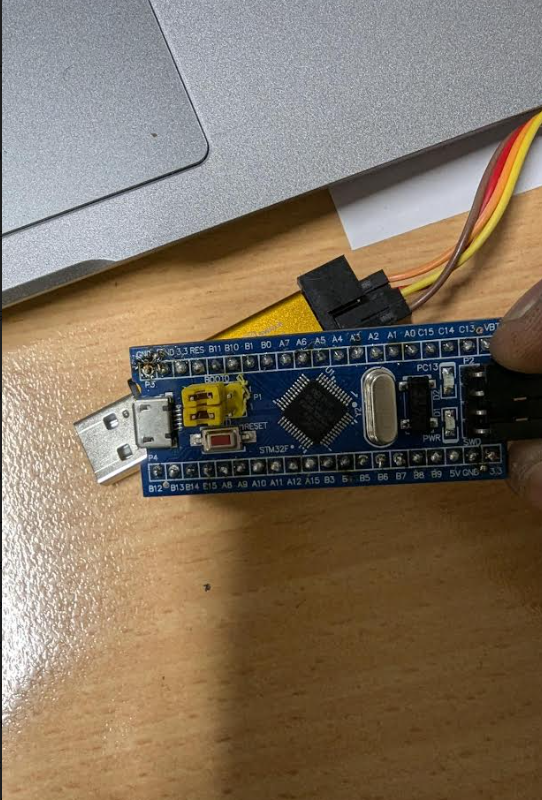
This tutorial will guide you through setting up your STM32F103C8 BluePill microcontroller with the Arduino IDE. By the end of this tutorial, you'll have your BluePill board blinking its onboard LED.
https://dan.drown.org/stm32duino/package_STM32duino_index.json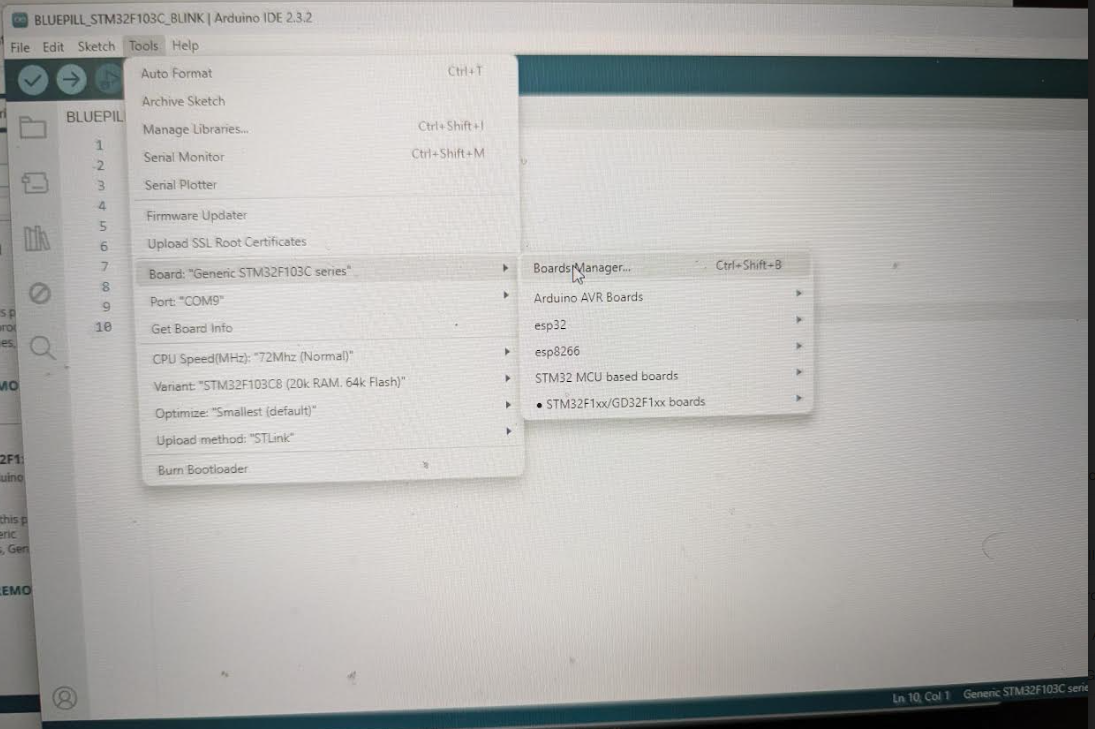
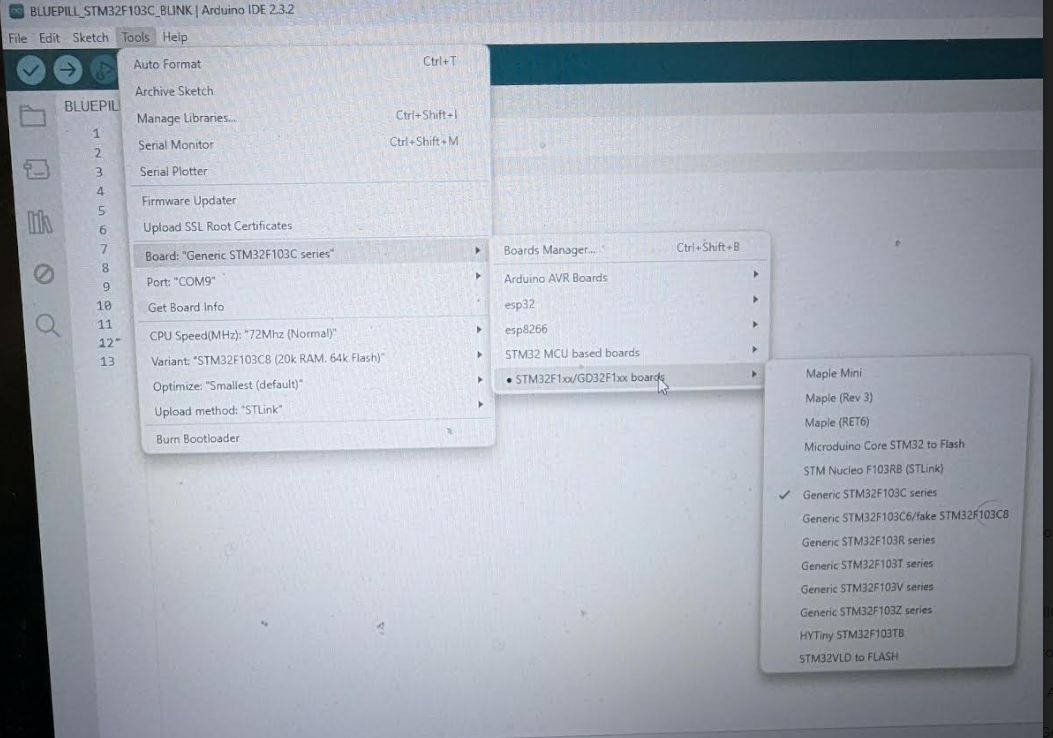
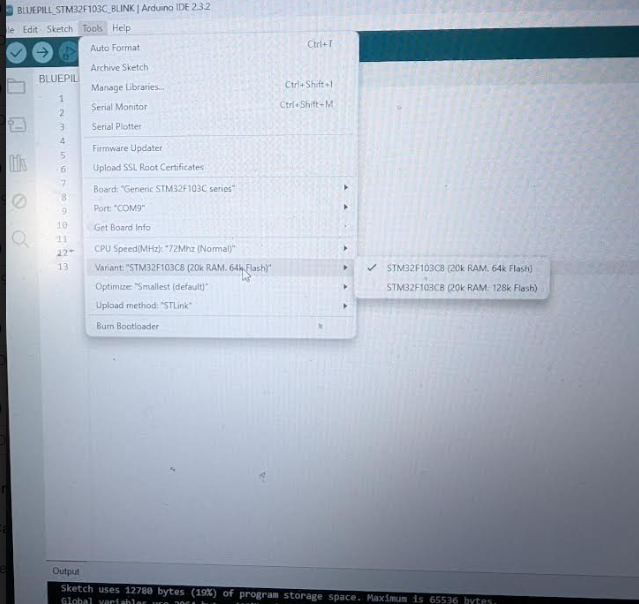
STM32F1.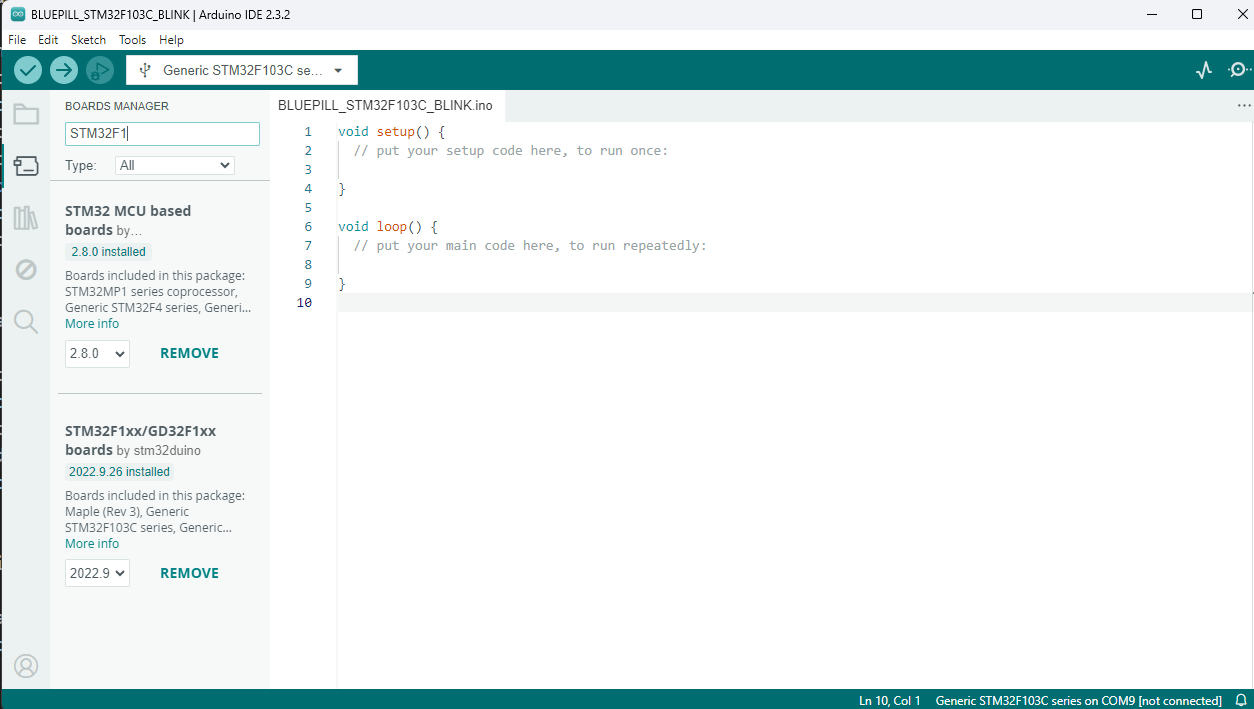
1 (programming mode).0.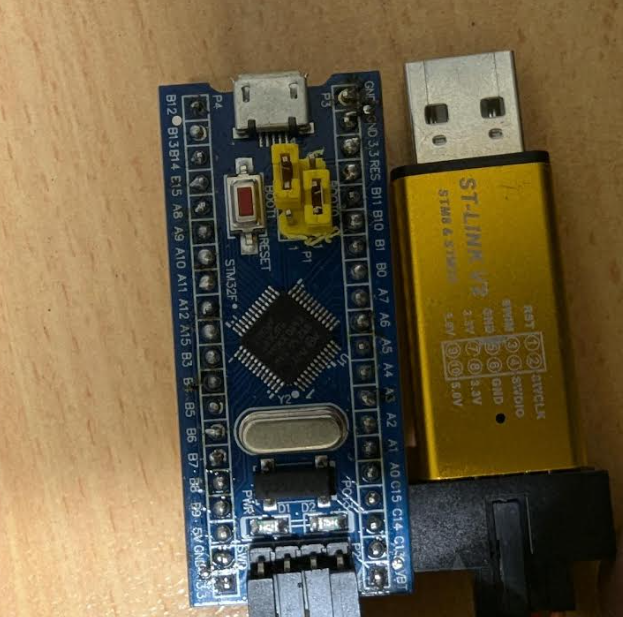
STLink. If using FTDI, select Serial.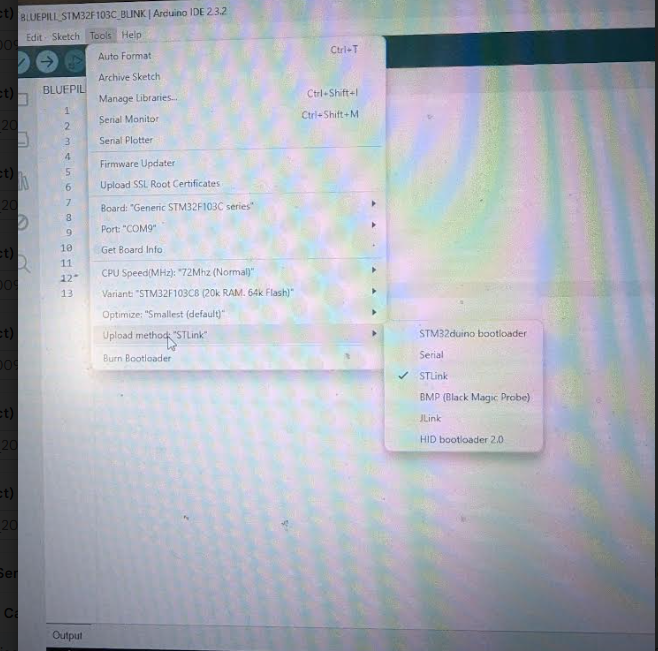
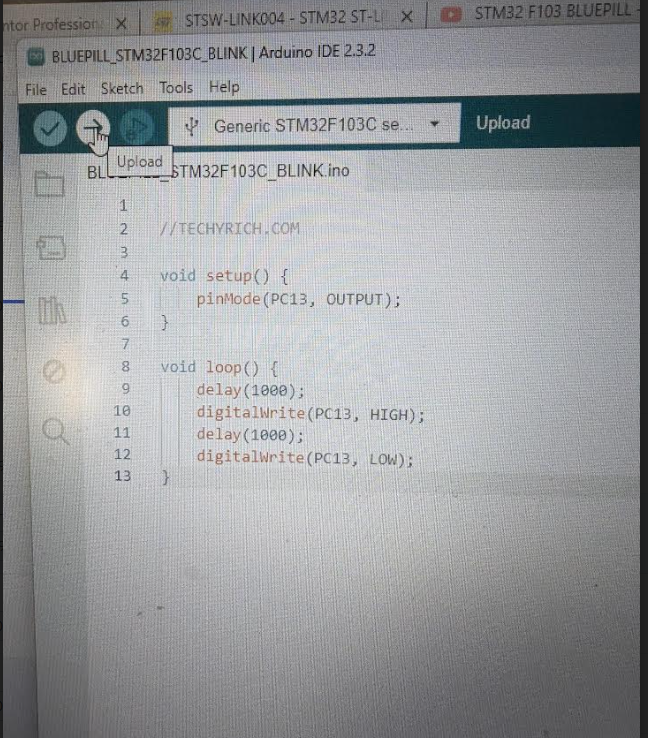
Copy and paste the following Blink sketch into the Arduino IDE:
void setup() {
    pinMode(PC13, OUTPUT);
}

void loop() {
    delay(1000);
    digitalWrite(PC13, HIGH);
    delay(1000);
    digitalWrite(PC13, LOW);
}
Disclaimer: The provided code is for educational purposes only. The author is not responsible for any damage to your hardware or software.
0 (running mode).0.
You have successfully programmed your STM32F103C8 BluePill using the Arduino IDE. The onboard LED should now be blinking, indicating that your setup is correct and your code is running.
Tutorial by RICHARD FOR TECHYRICH.COM
Happy coding!